Saturday, September 18, 2010

Blissfull ATC Swap for September


I opened the mailbox to find my first ATC sent to me by my swap partner Deb C. Her blog is called  Deb's One Life. If you want some inspiration be sure to check her site out. The theme for September is leaves and she did a beautiful job creating this ATC. Isn't it ironic that she displayed the word Inspire? She has inspired me not only with her art but with her faith. I love the rich coppery colors that were accented with a pearlescent hue of green around the border. Beautiful job Deb!

I recently joined The Blissfull ATC Swap. Once a month you swap an ATC according to the theme that is posted with a swap partner that the ladies at the Blissfull site match you up with each time. I really enjoyed this challenge and am looking forward to the months to come.


Since my swap partner received and posted my ATC on her blog, now so can I. Unfortunately I forgot to take a picture of my ATC before I mailed it so I just copied the one off of Debbie C. blog.

I matted brown and red together for the base of my ATC. I then added a floral and leaf print scrapbooking paper. Next I added an assortment of 3D stickers, which are the leaves, nuts and the butterfly. I also used a rub on to apply the word Believe.

What I think is so great about our swap is that the word meant so much to her and at the same time her word meant so much to me! We both wrote about it before we even discussed it!

Until Next Time... Take Care!

Friday, September 17, 2010

Mike's First Day of School Tag


I made this tag for the Tag Tuesday Challenge at Kard Krazy. The theme is school, so I made a tag using one of my favorite photo's of my brother's first day of 1st grade. My brother is 28 years old now! I wonder if there are any vintage tag challenges going on I could link up to? 


I had actually put the photo on the tag and had planned on adding some school themed patches, however it was just far to busy so I decided to use this quote from Quick Quotes, along with a few buttons. Since the quotes are printed side by side on vellum I couldn't just adhere the entire piece over the photo so I positioned it the best I could and traced my brothers image and then cut it out. I think it turned out pretty well. A lot better than I thought it was going to! 

A Tip: When you are attaching vellum like the quote above and you do not have anything to hide your adhesive behind or want to blend the vellum into your image like I have done on my tag, simply run your tag through a Xyron Adhesive Machine for complete coverage and adhere. I usually finish the look by rubbing the vellum into my image with my fingers. If you do not own a Xyron you can spray the vellum with a light coat of spray adhesive instead. 

I am also linking this tag to Top Tip Tuesday.


I used a scrap piece of chalkboard themed scrapbook paper I got at the dollar store years ago for the background on the bottom of the tag. I added embellishments like the felt eraser from Jolee's and JoAnne's to create a  blackboard scene including chalk that is simply white paper that has been rolled up. To finish it off I wrote my brothers name on the box and added the little sign that said First Day of School to tell the story of the tag without journaling. The alphabet ribbon that was used to separate the two different elements of the tag is from American Crafts.

I want to thank Kard Krazy for this challenge. I had fun creating the tag. It's been a long time since I have worked with school themed products. I also want to thank Top Tip Tuesday for the chance to share my project and tip as well as the chance to win some great prizes.

Until Next Time... Take Care!

Thursday, September 16, 2010

Friends From Far Away...


Do you know how special it is to open your mailbox and find a card from a friend? A friend from far away... a friend that has taken the time to make you a handmade card...  A special handmade card that she has taken the time to send to you and let you know that she is thinking of you... whether it is a time of joy or a time of despair. It is a feeling that is hard to beat. It's a hug from far away... it's one friend saying to another you matter to me.

The lord has blessed me to have such a friend... Kim B. from Gypsy Angel. She made me the card above.  We met at the beginning of the summer and in such a short time have shared so much. The lord placed Kim in my life for more reasons than one and I am so thankful. 

If you can relate with the words that I have written today, let those friends know how special they are to you. A few lines in a email could be enough, or maybe you to want to take the time to make and send them a handmade card. If you cannot relate, I pray that the lord blesses you like he has me.

Until Next Time... Take Care! 

My New Scrap Tool


Every once in a while I buy a scrapbook tool that I am impressed with. When I recently purchased the Scotch Advanced Tape Glider I was definitely impressed!

Before my purchase I had spent some time posting questions on forums asking other crafters their recommendations for a good adhesive, browsing the Internet and magazines as well as word of mouth. I have to say that no one ever mentioned the Scotch Advanced Tape Glider.

I don't have to tell you how expensive adhesive can be. Not to mention as papercrafters we need how many different kinds? I don't know how many times I've been in the middle of a project to have my adhesive dispenser run out. I've actually opened them up thinking that surely something is wrong to discover that nothing is wrong at all it just ran out... thinking to myself "Already?" 

On a recent trip to Michael's it was time to buy adhesive again! I picked out some refills, but on my way out I saw this large tape dispenser. When I say large, I do mean large! lol!! I actually picked up the box and thought to myself "Who in the world uses these giant things?"  After I started to read the box and just how much adhesive this thing held, 216 ft, I quickly became interested. The price was around 30.00 but I had a 50% off coupon, so that brought the price down to around 15.00 and it came with 2 rolls of acid free adhesive. And it's pink... I'm sold.

After 10+ years of paper crafting and I hate to think how much money, I have finally found an adhesive tool that I am 100% happy with. The tape is a nice 1/4" wide, I have had no problem with the tape breaking or sliding around and the adhesive goes on nicely every time. However the one thing that put this tool over the top for me was that I put together a 8 x 8 scrapbook album using only the Scotch Advanced Tape Glider, besides glue dots for heavier embellishments, and I still have over 1/2 of my roll of adhesive left!  Then of course it's pink...

To answer my previous question "Who in the world uses these giant things?" the answer is me! So next time you need to buy adhesive I strongly recommend giving this great tool a try. I  am sure glad that I did.

If you have any great tools that you have discovered I would love to hear about them. Thanks for coming by. When leaving a comment, please leave your blog address so that I can drop in and say hi.

Until Next Time... Take Care!

Tuesday, September 14, 2010

Vintage Halloween Card and Tag Set


This is a Vintage Halloween Card and Tag Set that I made for a challenge and have brought out of the archives to post and kick off the holiday season and all of the great creations that are to come here at my blog and my Etsy Shop, Scrapping With Sherry.

I started out just making a card, but I had some left over supplies and decided to make a coordinating tag to make a matching set. 

I absolutely love the Vintage Graphics that I used and wish that I could tell you, and myself for that matter, where I got them from but I had them for so long that I don't remember. Also, a lot of the supplies that I still have today have been organized and put into folders, holders and handy storing cases before I ever knew that I would be blogging or entering my work in anything and did not bother to keep information on suppliers or names of products.  Can anyone relate with this? I regret it now but it's a little to late for that.

There is not much that has not been done to this card to distress and age the look from tearing the edges to applying antiquing solution. To finish off this set, I sprinkled a great product called diamondz in the color onyx randomly over both the card and tag. I love this stuff and will be pulling it out to add to alot of my Halloween creations this year.

Thanks for stopping by. I hope that you enjoyed the Halloween Card and Tag Set as much as I enjoyed making them.

I have linked this set to the Halloween Challenge at Cardz TV. If you want to see a large list of fabulous Halloween cards be sure to check it out.

Until Next Time... Take Care! 

Monday, September 13, 2010

Featured Artist


I am truly honored to have been chosen to be a Featured Artist on Cindy Adkins blog, I Owe it All to Him. One of the biggest compliments that I could receive is for someone to acknowledge my work for more than just its beauty but what it meant to them as well.

Cindy beautifully writes about what one of my creations meant to her through her own reflection and thought provoking questions for the reader as well. This article shows that she is a artist in every way.

If you would like to read the article that she wrote simply follow this link, Featured Artist on I Owe it All to Him.

Thank you Cindy!

Until Next Time... Take Care!

Sunday, September 12, 2010

Sherry and Friends Favorite Book List


Last month I had a giveaway to celebrate my blogs 30 day birthday. In order to enter I asked readers to tell me what their favorite craft book was, or another book if they did not have a craft book in mind.

I am a craft book collector and wanted to learn of some new books that I might have not otherwise known about. I had such a great list that I decided to share it with everyone. However, I did not know what I was getting myself into. LOL!!!

I wanted to list the books along with the name of the person who submitted the book, their blog address and comments on another page here on my blog. Well the list was to big to view that way so you simply have to click on the link provided under my blog banner titled, Sherry and Friends Favorite Books or click here.

Please note that I did not use Amazon.com to make money off of this list. It was simply the best way to show and view all of the information about the books and include the information about who submitted the book as well.

If you did not get a chance to submit your favorite book and would like to now, just leave the name and author of your favorite book and why in the comment section following this post and I will be glad to add it to the list.

I hope that you enjoy the list as much as I have and who knows maybe you will find your next favorite treasure among them.

Until Next Time... Take Care!

Saturday, September 11, 2010

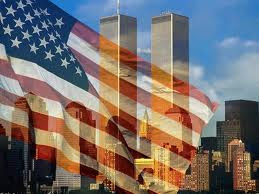
September 11th


September 11th is a date that will not be forgotten in my household. Although I did not know anyone that lost their life in the tragedy that hit not only the twin towers but the entire United States as a whole, I feel that it effected everyone in one way or another.

This morning started off with everyone reminding each other what day it was followed by each one of us thinking back to what we were doing on September 11th 2001, nine years ago, today.

My fiance, Glen, was watching a football game and dozed off. When he awoke it was not his game that was on the air but the news of the tragedy that had hit New York and the Twin Towers. He actually thought that he was watching a movie at first before it registered that what he was viewing was real.

My daughter, Jaclyn, was in school when they announced the event. Scared and shaken she called me to come and pick her up. It was confusing to say the least to a girl of such a young age.

I was cleaning house with the TV on for noise like I still do today when I overheard the breaking news. I remember watching the television in awe not knowing what to think. I sat there spellbound until my daughter called for me to pick her up.

Today I say a special prayer for those that lost their loved ones, for those that helped in the aid helping those that were directly involved that frightful day. I say a prayer for anyone that was effected in any way on the day that America will never forget. I say a prayer that never again will we as a country have to experience such loss and sadness. 

Where were you on September 11, 2001?

Until Next Time... Take Care!

Monday, September 6, 2010

September Creative Spirit Challenge: Wedding Album & Card

It is time for Cindy's Creative Spirit Challenge for September! Every month she holds this link party at her blog, Cindy Adkins' Whimsical Musings. Cindy made this months winner a beautiful Creative Spirit Bracelet that was featured at Graphics Fairy. Along with the bracelet the winner has bragging rights and is crowned Miss Creative Spirit for the month of September.

My Creative Spirit Challenge entry is below. 


I had a request for a 8 x 8 pre made scrapbook album to be made for a wedding gift. I did not have a lot of notice, but I almost think that was better for me because it got me back into the swing of things after being sick. Crafting wise anyway... I think if I would have had a while to get it done, I know that it would of taken me longer to recuperate. This album was just the push I needed to get back to work.

I made an 8 x 8 pre made wedding scrapbook with a matching card. I also managed to put together a matching gift bag and tissue for the gift to be wrapped in. I am very happy with the results. I wish that I was as happy with the pictures that I took! Unfortunately, I can not go back and take more pictures because it has already been gifted. I am thinking about having copies made of my work from now on, instead of taking photos. At least the larger projects, like this one for instance.

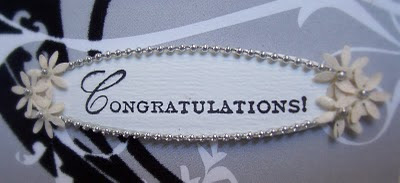
The first photo above is the card that I made as part of the package.


I hand stamped "Congratulations" on one of the embellishments that came with the "Wedding Cake" 3D sticker package by Jolee's, that I used to embellish the front of the card. The sentiment stamp is part of a set by Anna Griffin. I am a big fan of her sentiment stamp sets.


The 8 x 8 album cover is made from black cloth. I added a coordinating piece of scrapbook paper to the photo section and then embellished it with the initial of the groom's last name, in black pearls. This picture does not do the album justice. A matter of fact the paper looks nothing like what the picture depicts.


The cardstock that was used for the background of the layout pictured above is the same pattern that I used for the front of the album. You can see the colors much better in this photo. All of the scrapbook paper that I used for this album is actually specialty cardstock by me & my Big ideas. The paper stack is simply called "Black and White". However, there is nothing simple about it. Most of the different designs have flocking and there are also 4 transparencies.


I also added a metal embellishment by Making Memories. You will see as we get further into the layouts that the white pearls are a perfect match! 


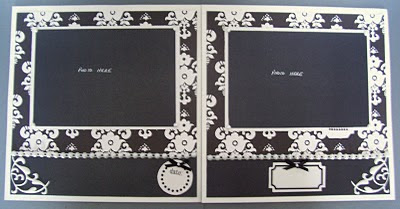
This is the first page of the first layout... I took pix of the layouts side by side but unfortunately this was the best choice as far as quality. Believe me I do realize that this photo is not that great either.


The tag that says "Beautiful DAY" is made out of chipboard and came in a kit called "Nocturne" by Colorbok. I added the white bow and black pearl to the tag to dress it up a bit.


Above, is the second page of the first layout. You can see that the photo mats are made with pearlescent cardstock by Colorbok. The colors of the photo mats may change throughout the book but they are all made from the pearlescent cardstock. So pretty! There are several white and black pearls that adorn both pages, as well as throughout the entire album. White organza and black satin ribbon were also used. The flowers are by Prima. I added the pearls to them and the journaling block as well.


 The journal block and the place for the date on the first page both come from journaling sticker books called, "Remarks" by American Crafts. I used different ones from the book throughout the entire album.


Above is the second layout in the wedding scrapbook. For the most part the same elements were used. This time I did us a rub on to add "The Story of Us" along with the flourish to the first page of this two page layout.

On the second page I added a tag and envelope as well.


The envelope is actually made from a gift card case. Coordinating cardstock has been added to the front. I also added pearls and a white flourish that is made from a nonporous type of plastic.

I actually bought the flourishes a few months ago and was going to try using Tim Holtz alcohol inks on them. I still have some left though and will let you  see the results by posting to my blog after a play around with them a bit.

I learned a neat technique quite a few years ago when I first started scrapbooking and card making. You may have heard of it. I am always surprised because I have rarely ever seen another papercrafter apply it to their work.


What I do is attach the tags envelope to the layout before I put it in the album. I then make a slit with a craft knife through the protective cover so that I can actually slip the tag into the envelope from the outside of the clear page protector. This way when someone is viewing the book they do not have to actually remove the scrapbook page to read the tag. The tag can be removed and put back independently. I have always felt that it makes a scrapbook more interactive too.

Above is a picture of the tag half way out on the top of the page protector and the envelope is still attached to the page.

The tag that I made for this album is actually just a plain black cardstock tag with black and white fibers tied at the top. I added the newlywed's marriage application announcement from the local newspaper. This was a very small ceremony and there was not alot of memorabilia to work with. Our newlyweds don't even read the paper so the bride had not even seen the announcement until she viewed it in her new scrapbook. I thought that was neat.


Above is the third layout. This time on the top half of both of the pages I added coordinating transparency layered on top of white pearlescent cardstock. I also used a different type of ribbon along the top of the bottom borders. It is a white satin ribbon with silver wording. The words that are showing are togetherness, love, cherish and feelings. This ribbon comes in a package containing three different wedding themed designs by Making Memories. I have to say that I think the ribbon is very pretty but you want to be careful because you do not get a whole lot of each design. 


Again, white flourishes were used.


I went ahead and added another flourish picture. I felt like this picture shows the look that you achieve when you layer pearlescent cardstock and transparency paper.


I also used another journal block adorned with more ribbon and pearl embellishments.


On the second page of the layout, I also added another metal Making Memories embellishment that says, "Here comes the Bride".


The fourth layout is actually one of the more simpler layouts. Both pages have alot of the same elements that you have seen on previous pages before.


I used one of the smaller journal blocks for this layout to. Instead of ribbon I opted to use what is supposed to look like a string of white pearls.


This next two page layout, pictured above, is the fifth layout. On the first page of the layout I used another chipboard embellishment of a butterfly from the Nocturne Collection.


On the second page I added another journal block adorned with the pearls and then simply placed some of the Prima flowers along the sides towards the bottom of the page.

For a more simple layout, the colors and the look of the flocked specialty cardstock really made this layout a pretty one. I still haven't been able to decide, but this layout is one of my favorites.


For the sixth layout I chose to use the white organza and black ribbon for an embellishment. I also tied some simple bows out of the black satin ribbon and added a few pearls. White flourishes were added as well. This background design has the beautiful flocking. If done right, flocking really adds such a richness to the background design, and the whole album for that matter.


I used a rub on to add "Happily Ever After" directly to the cardstock background.


I also chose to use another simple journal block on this layout to make room for more photos.


On my seventh layout I used the layered Prima flowers as a border instead of the ribbon. I added a journal block and a small place to include the date. The reason for the different places for the date is to allow the couple a place for photos of their honeymoon as well.


Even though I had already included the full layout I wanted to also include a photo of one of the pages by itself. It is such a higher quality photograph and really shows off the colors and layout much better.


I included another chipboard embellishment to adorn the side of the journal block. Of course pearls and ribbon were added to both.


On the second page of the layout I added the word "Always". It was part of the Making Memories metal embellishment package. Unlike the metal embellishments however it is made from chipboard and covered in silver glitter.


Well, above is the eighth layout... one more to go after this one!


Again, I chose to show you one of the pages because it just shows the details, colors and the overall feel of the layout better. I would show you each page and just exclude the two page photo but the first page of this layout didn't turn out so hot...

Wish I could just blame it on the camera, but I am afraid it's me. I actually just got a new 10 mega pixel camera but I have not figured out how to use it yet. I am just as bad as most men when it comes to reading instructions. (Shh! Don't tell anybody. I would never admit this to Glenn!) Anyway I need to learn and quit using this 4 or 5 mega pixel camera. Maybe that would help...

Actually I know this is a little off the subject but I would love to hear how you take your photos of your crafts? Of do you scan them? Any tips, tricks or advice would be so appreciated.  I spend entirely way to much time attempting to get decent photos for my blog, my Etsy Shop, etc. It just doesn't seem like it should be this hard.


Back to the layout... I used a metal quote that says "There is only one happiness in life, to love & to be loved. ~George Sard. When I first read this quote I thought to myself that it was not true that there are alot of other things that make me happy. After tossing this idea around a while I came to the realization that we can love anything. For instance I love my crafts, which in turn make me happy.

I used a single strand of black satin ribbon this time and then adorned it by placing white pearls every 1/2 inch. I really liked the look when it was done.

And again, another chipboard tag was used that states "Together Forever".


Above is the first page of the ninth and final layout.


I used a date tag from the journal collection, a Prima flower and a chipboard flower for decoration along with the photo mat, ribbon and pearls. Of course we cannot forget the great background specialty cardstock.


On the second page of the layout I added a journal block along with the photo mat, ribbon and pearls.

All of the photo mats in this scrapbook were measured to fit 4 x 6 photos. When making a pre made scrapbook without being able to speak with the owner of the book I do not make photo mats that would require the person completing the album to crop their photos. Not everyone knows how to crop photos or wants to for that matter. I generally cut my first layer at 4 1/2 x 6 1/2 in size and then the second layer or top layer of the photo mat is cut at 4 1/4 x 6 1/4 in size and then attached to the bottom layer. This makes for a double layered photo mat with 1/4 inch borders.


I know that it was not necessary to show you this chipboard flower embellishment photo. It was easily seen on the layout photo but I simply wanted to include it because it turned out good and I did not want to waste a good photo...

I hope that you enjoyed looking through my pre made wedding scrapbook as much as I enjoyed putting it together. Hopefully you were able to gain a few new tips or some inspiration for your next project.

Don't forget to stop by and see everyone's entries for the Creative Spirit Challenge at Cindy Adkins' Whimsical Musings. Everyone is welcome to join the link party. Like Cindy says "The more the merrier!" 

Thanks for stopping by. I would love to hear from you. You can leave your comments following this post. Please remember to also leave your contact information if you would like for me to reply.

Until Next Time... Take Care!

Thursday, September 2, 2010

Under The Weather


As some of you know I have been away for a while as I have been under the weather... sick. I am so grateful however to be back. It is going to take me a few days to get back in the swing of things but the important thing is that I am able to do so.

I want to thank everyone for all the well wishes, prayers and cards like the beautiful card above, made and sent to me from Barbara H, who is a member of my Yahoo! Papercraft Swap Group, PBS Swappers. (Thanks Barbara H!) I am touched to say the least by all of the gestures shown to me by the friends that I have made through my group and blog. Crafter's are the best!

I look forward to getting in touch with everyone and getting back to doing what I love... crafting!

Thanks everyone.

Until Next Time... Take Care!


Related Posts with Thumbnails
PitaPata Dog tickers